Turn Tree Stumps into Chairs and Stools
It's easy to overlook the stumps in your yard when you're searching for materials for your next DIY project, but these seemingly annoying tree remnants are the perfect candidates for stools and chairs. You'll need to lay the groundwork before you can begin the process of transforming your stumps into quality furniture, but once you're done, you'll have created the perfect addition to your patio or living room decor. Here's a detailed, step-by-step guide to preparing a stump for your usage, and we'll also acquaint you with some of the best tree stump chairs and stool ideas.
How to Prepare a Stump
While it's clear that stumps have potential that's commonly overlooked, you can't just take a stump out of the ground and turn it into a chair or a stool right away. If you want your creative idea for your stump to pan out, you'll need to lay down the proper groundwork first.
Picking a Good Stump
Not all stumps are created equal. As you select the stumps in your yard that will work for your project, start by inspecting them for wood rot or extensive water damage. As a general rule of thumb, if a stump starts to fall apart when you touch it, if it's filled with bugs, or if it's covered in moss, you should probably move on. Plus, certain species of trees make better stumps than others; for instance, red cedar, oak, and redwood trees make incredible stumps that will last the test of time.
Cut It Out
Once you've found a promising stump, you'll need to cut it out of the ground. As long as your stump remains connected to its roots, it will be susceptible to rot, so you'll need to get your prospective stool to its drying area as soon as possible. While you can always dig your stump out of the dirt if you're feeling ambitious, it's usually easier to simply see it off a few inches above the ground.
Using a chainsaw is the simplest way to accomplish this task, but these saws require a significant amount of clearance, which means you'll lose valuable inches of stump if you go the powered route. As an alternative, you may want to follow the path of a true stump purist by teaming up with a friend and using an old-school two-man crosscut saw.
Dry It Out
Now that your stump is out of the ground, you'll need to give it plenty of time to dry out all the way through. Most experts recommend that you leave your stump outside somewhere that's out of the rain, but if you have a woodshed, sticking your stump in this semi-enclosed space will do the trick as well.
You'll need to find some way to keep your creative urges alive as you patiently wait for your stump to be ready for action; you may want to let as many as six months elapse before you move on to the next step of your natural stool or chair plans. It will become clear that your stump is ready to go when it's a uniform tone to the centre, and it's significantly lighter than it was when you removed it from the ground.
Remove the Bark
Your stump is almost ready to be transformed into a work of art, but you'll need to get all of that rough, unsightly bark off of it first. To get started, simply insert a prybar or a chisel between the bark and the stump (after drying, there should be a significant gap between these two sections), and rain down blows with a relatively large hammer. Make your way around the perimeter of the stump to remove all of the bark, and then use sandpaper on the newly exposed interior wood to make it soft, smooth, and ready for your plans.
Ingenious Stump Chair and Stool Ideas
Now that you have a stool that's prepared to perfection, here are some simple ideas for what to do with it:
Woodland Throne
This idea requires a stump of a significant height, but it's one of the coolest options that you have at your disposal when it comes to your expertly prepared stump. To pull off the woodland throne, you'll need to use a chainsaw to cut about two-thirds of the way into your stump about halfway down its length. Then, use your chainsaw to cut from the top of your stump down to the incision you made laterally. A big chunk of your stump will then come off, and it will leave a perfectly good chair back and seat in its place. From there, you may want to use a chisel to make the back of your chair curved and comfortable, or you may simply want to leave it as it is and use sandpaper to eliminate any potential splinters.
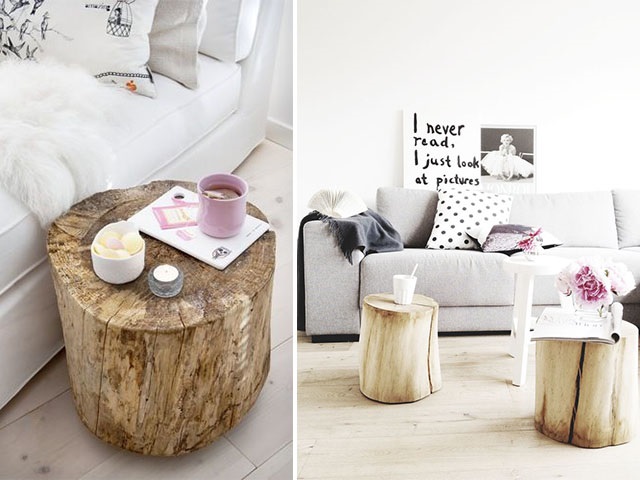
Simple Stool
If you've already removed the bark from your stump and sanded down its exterior, then you're pretty much done with the process of making a basic stool. Your stump is now ready to be deployed on your patio, in your living room, or your bedroom as a bedside table, but you might want to add some wood finish or do a little bit more sanding before you call it good.
Leave the Bark On
You may choose to avoid removing the bark from your stump if you want to give it a truly rustic look. One way that you can achieve the best of both worlds is to sand the bark down until it's nice and smooth; that way, you preserve the dual-tone appearance of a natural stump without rubbing your guests the wrong way.


